Exercise 4: Collating and binding
- Christine Griever

- Mar 21
- 7 min read
Reflect, evaluate and rework
Having printed your images from the previous exercise, take the opportunity to view all of the pages, reflect on them and evaluate before moving on to the next step of collating and binding the pages together. Which pages are successful? Which pages have not turned out as well as you had hoped? Are there any visual surprises, or happy accidents? Given the experimental and open-ended nature of this exercise, the answers may be quite subjective, but it is important you reflect
on these and other questions, to sharpen your self-critical awareness and assessment of your own progress.
You may want to re-work some of the images, and the printing process, and this is your opportunity to do that. You may end up with more and more pieces of printed paper.
Select and collate
Evaluate the strengths and weaknesses in your work and then begin a process of selecting up to 16 pages that work well together as a whole. Do these pages have images on each side of the page, or will the images appear on facing pages only? If you want to create back-to-back images you can work manually to cut and paste images and pages, using spray mount or similar. Equally, you can collage elements of printed ephemera onto and into the pages. Again, the brief is to be
experimental, so work inventively with the process, cutting, gluing, pasting and arranging as you see fit. Collate these pages, putting them into a running order from beginning to end.
Binding
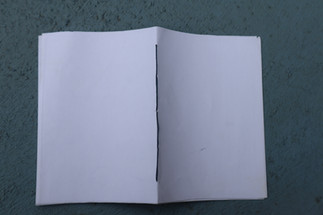
Drawing on your understanding of bookbinding so far, bind your 16 pages into a small book format. How will the pages be held together? Consider how the pages might be bound and experiment with solutions. Will you create a cover? Will the pages be stitched, sewn, glued, stapled or will you use another inventive approach?
There are many ways to bind a book, either by hand or by machine. A few examples of bookbinding are saddle stitch, Japanese binding, coptic binding or perfect binding. Consider which binding is most appropriate for your book. There are some good tutorials online of bookbinding and this might be useful for you to have a look at. Try to use one of the bookbinding techniques mentioned above for your own book.
Document the whole process, photograph the book and incorporate them into your learning log, accompanied by supporting work, including pages and images you chose not to include into the final book form.
Reflect, evaluate and rework
Overall, I was happy with the final design for the sequencing images exercise. I produced an accordion fold that worked well with the images I chose to represent the poem. I liked that the narrative was non-linear, which was a surprise to me, because I'm a person who likes rules and following and maintaining order, so this was a different direction for me to go in with the addition of the abstract look that took me out of my comfort zone.
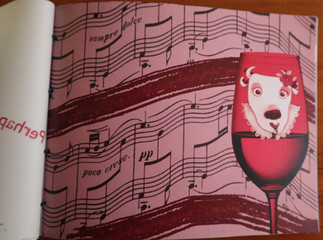
I think I had very successful pages. In particular, I like this image, because of the colours. I chose these colours to represent the modernisation of the city spilling over into the rural areas. So, I decided to make the grass pink and wavy and give the text movement.

I also enjoyed making this page because I could use Photoshop to mask the record player into the river bend. Instead of the sparrow being in a tree, it was perched on the needle of the record player. I like that I could experiment with the images and make them more conceptual.

I reworked this image, changing the colour and text positioning to add more masking to the letter "O".

I feel that this image fell a bit flat. I feel now, looking back, that it was too dark and perhaps needed some text on the page to give it more context.

I reworked this image to be more pink/purple and added text for more context.

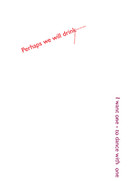
For this image, I like that it suggests speed, and I wanted this effect to convey the fast pace of the city's modernisation. However, for a book with a double-page spread, it won't work, as this was originally three pages in the accordion fold. I condensed it down from three pages to two pages.

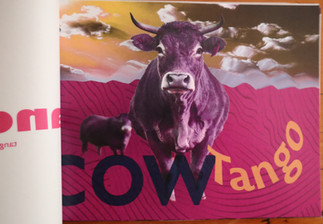
For exercise two, I was asked to produce concrete poetry for the poem Tango with Cows, this was my final design, but printed on tracing paper.

I had to reduce a page from 3 to 2 to fit it into the new book. I decided that I would like to try and layer the tracing paper to give a different effect to the finished work above. I want to see if binding different papers together, like tracing paper and card in the same book, will work.
Select and collate
I had to rework many pages from the accordion fold into the new format. I jumped ahead to the binding section of the exercise to work out what format I would use for my reworked book. I was drawn to the Japanese binding for its exposed stitching. I could use a thread that contrasts with the book's cover to make it stand out more. I was thinking of using ribbon, but realised that I couldn't thread ribbon through a needle! I stuck to my sample thread. I like how the binding becomes part of the book's function. In my sample, I used an A6 portrait as a sample. In the reworked version, I will use landscape A5.
Below, I worked out my flat plan and ideas for collating the pages together.

These are the reworked images, with a tissue paper overlay using words from the Tango with Cows Poem.


I used Adobe InDesign to layout my book, leaving a 25mm margin on the left for my Japanese binding.

In Adobe Illustrator, I used my artboard to create the overlays for the pages to be printed on tracing paper. I used my file from the concrete poetry exercise and extracted lines from the poem. I didn't want to use many words or heavy images as I was aware that printing on tracing paper is quite precarious and kept it minimal. The idea is to have a subtle overlay that takes the reader into the page.
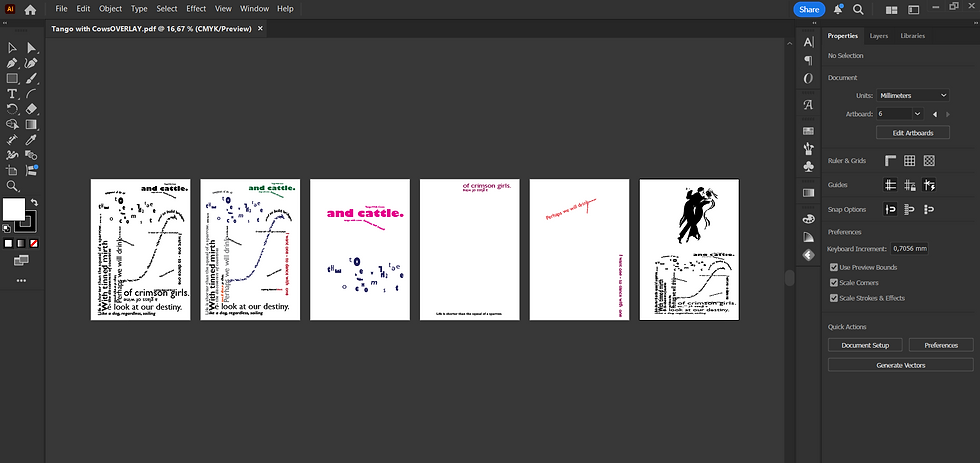
When it came to printing the pages, I had no problem with the InDesign images, as I was printing on 160 gsm white paper. However, when it came to printing on tracing paper, I ran into quite a few problems! The paper got stuck a few times, and it tore. I used A4 paper and stuck the tracing paper on top to make it thicker. I eventually got all the pages printed. However, some were torn, and I felt I was pushing my luck using the work printer to try anymore.

So, I turned my torn pages into these.


Binding
I watched quite a few tutorials online and started exploring with the saddle stitch (handmade) with scrap A4 paper. I like this method because the stitching is mainly hidden.
Saddle Stitch


Row 1( L-R) 1. Marking where the holes should be sewn. 2. Sewing the pages together using needle and thread. 3. Tying the inside pages with a knot. 4. The outside of the book finished. 5. First pages of the book with the sewing hidden.
Japanese Binding
With this book, I cut 16 pages of paper and arranged them in a pile. While making the holes, I held the paper together with a clip. I used the same thread on the scrap paper as I did for the saddle-stitch book while I experimented. I also like how this book turned out, especially the exposed stitching. I think, with the stitching exposed, I can use a contrasting thread on the paper to make it stand out and be part of the book's aesthetic.


Row 1. (L-R) 1. Making holes in the sheets of loose paper while being held together with a clip.
2. Starting the stitching process. 3. Front of the finished book. 4. The back of the finished book.
5. Inside the book.
Stapled Book
For this sample book, I used staples; this is probably the easiest and most straightforward way of binding a book, especially with a few pages, such as this one.


L-R 1. Inside the stapled book. 2. The outside the stapled book.
Sewing machine book
For this book sample, I used a sewing machine to sew together the pieces of paper.


L-R 1. Close-up of the sewing machine stitching. 2. Inside the sample book. 3. Outside the sample book.
Glued book
I watched a video on Skillshare about gluing a notebook together. It was really interesting. I was short quite a few materials and tools to complete this sample effectively, but I wanted to keep this video for future use.
Binding the final book
I used Japanese binding to finish my book. First, I made a template so I could mark where the holes would go, then I made the holes. Then I started threading the book, and then I tied the final knot to secure the binding.


Final
I took photographs of my final book. I'm not sure my photos did the book justice, as it looks so much better in real life! It was quite awkward to photograph with the binding, trying to keep the book open.


Reflection
I loved the process of putting together my first book and combining the elements from the previous exercises to reach the final version. I took my concrete poetry and used that as a base for the sequencing images exercise. For this exercise, I was able to combine the use of different paper stock like tracing paper and card and experiment with collating the images. It was satisfying to then be able to bind a book by hand to pull all of the elements together.
I learned how to use different binding techniques to create books by watching tutorials. I would have tried gluing books together, but I didn't have enough signatures to make a book or the materials needed to make it. However, this would be something to try out later on in the course.
Working with tracing paper was difficult because I was using my work's printer, terrified that I might have broken it by getting tracing paper stuck inside. I thought I would work with what was printed. This turned into a happy mistake that I was quite pleased with in the end. I was able to create tracing paper pages that were different in look but still worked with the other pages in the book.
This exercise was a good place to experiment with different binding and paper stock, and I'm pleased with the results of the finished book.


Comments